
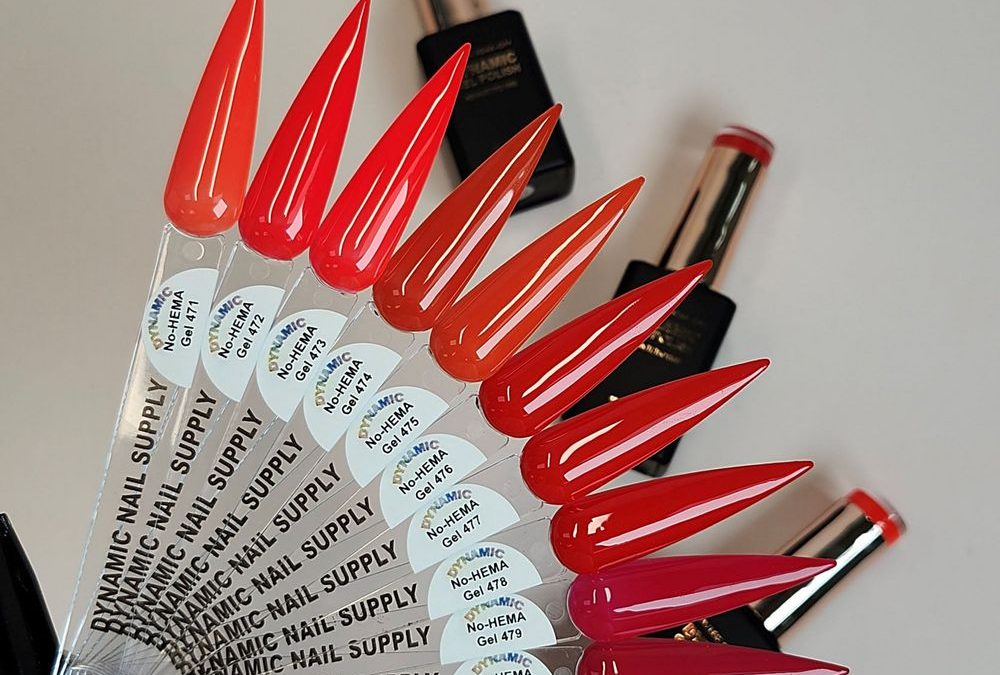
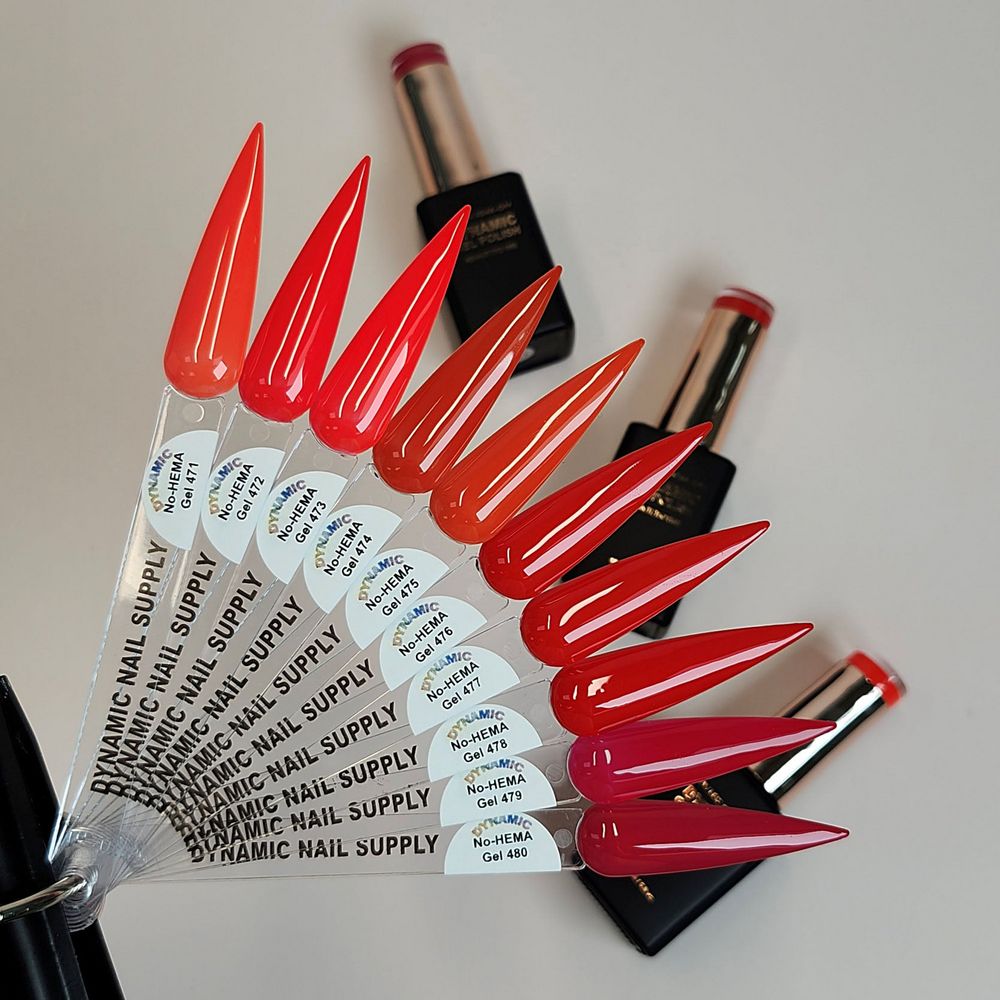
Quick answer: yes — you can produce a salon‑quality sunset ombré on long stiletto gel nails by layering light coral, vivid tomato and warm burnt orange red creams in thin, controlled passes, curing between layers and finishing with a high‑gloss top coat; below we outline the station, timing and a step‑by‑step workflow using the Fall Vibes Collection (No‑HEMA Gel 471–480) as the recommended product set.
Why this coral to burnt orange gradient works for home‑based bridal services
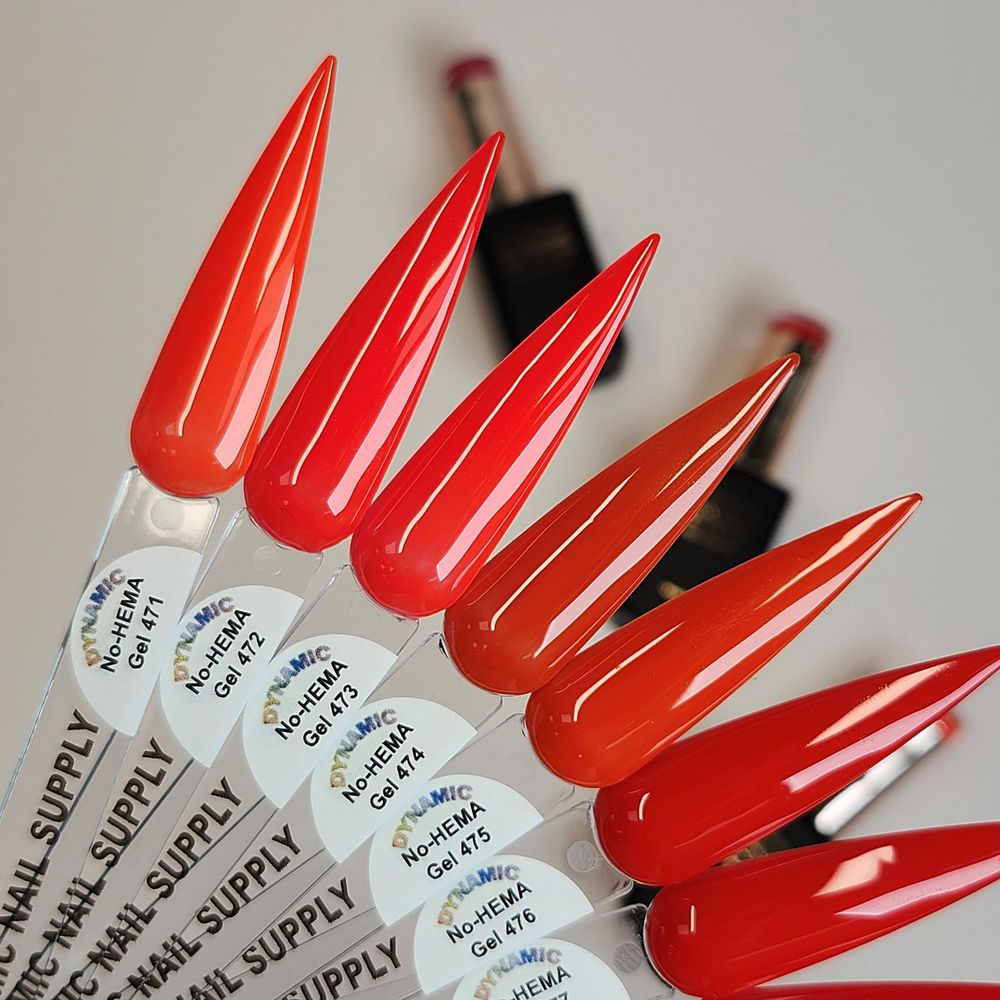
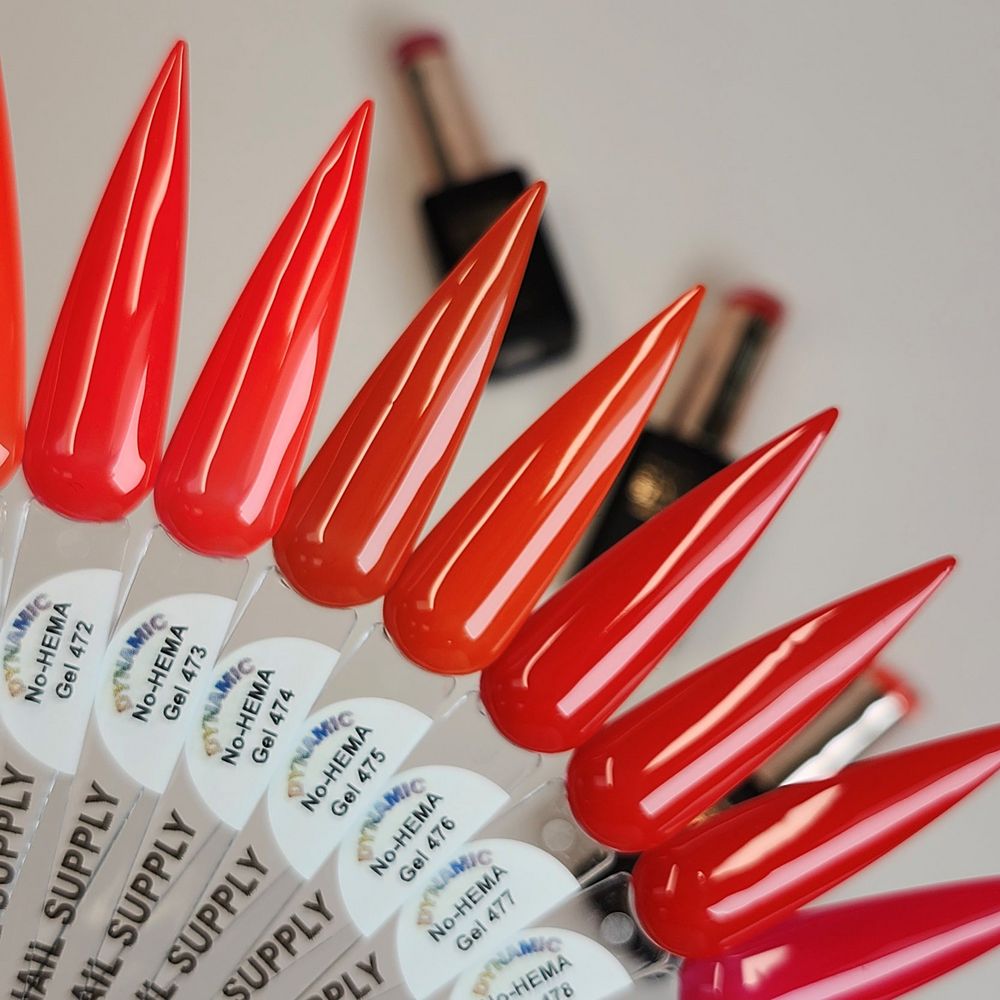
We focus on small, hygienic workspaces and repeatable steps that protect a home salon’s reputation; a sunset ombré built from light coral into warm burnt orange reads refined for bridal parties because the palette moves from bright warmth to deeper warmth without introducing cool or brown tones that can muddy photographs. The Dynamic No‑HEMA Fall Vibes fan presents a cohesive progression of warm corals and reds with mirror‑like cream glosses that make blending predictable on long stiletto tips, and the HEMA‑free formulation helps reduce occupational exposure to a common allergen for technicians who perform back‑to‑back appointments.
What you need at your station
- Work surface with disposable liner, two covered pots for cotton and wipes, and a fan or mask for ventilation.
- Basic tools: pushers, cuticle nippers, 180/240 file, 240 buffer, lint‑free wipes and 90%+ isopropyl alcohol.
- Long stiletto practice tips or extensions installed to client preference — the product photos show all swatches on long stiletto tips, which helps predict color depth and opacity.
- LED/UV lamp rated to cure the gels for 60–120 seconds per layer as needed.
- Dynamic No‑HEMA Gel Polish colors from the Fall Vibes set: select a light coral orange, a vivid tomato red and a warm burnt orange‑red as your trio for the sunset blend.
- High‑gloss topcoat compatible with HEMA‑free gels and a clean‑finish wipe solution.
When to prep and how we prepare natural nails for long stiletto gel work
We always begin with a client consultation to confirm length and stiletto approval, then sanitize hands and sanitize our tools according to our home‑salon protocol. For natural nails: remove oils, dehydrate with alcohol, lightly buff gloss off the natural plate and push cuticles back to create an even proximal canvas that lets cream gels lay flat. If the service uses extensions, confirm the tip seam is smooth and sealed before proceeding — gaps will show through cream finishes and create lift risk.
What each color role is and how to plan the blend
Assign roles before you paint: the light coral orange anchors the cuticle area and lower half of the nail, the vivid tomato acts as the mid‑zone bridge, and the warm burnt orange‑red sits at the tip and outer edges to read like a sunset horizon. Because these are high‑pigment cream formulas, you can build opacity in thin, even passes rather than fighting streaks, and curing between thin layers prevents pooling at the stiletto point.
When and how to apply: step‑by‑step salon and at‑home workflow
- Base: Apply a thin, tack‑free base appropriate for extenders or natural nails and cure according to the lamp; this seals the nail and gives the subsequent cream nothing to soak into.
- First pass — coral placement: Paint the lower third of the nail with the light coral orange in a thin coat, leaving a soft feathered edge where the mid‑zone will blend; cure for 60–120s depending on lamp output.
- Second pass — tomato bridge: Apply a thin coat of the vivid tomato red across the center third, slightly overlapping the cured coral edge; do not flatten the overlap — instead use a clean, damp brush or a micro‑sponge to soften the seam immediately before curing, then cure.
- Third pass — burnt orange tip: Place the warm burnt orange‑red at the tip, again overlapping the tomato just enough to feather; for stiletto points keep product thinner to avoid pooling and a heavy bulb of gel at the apex; cure.
- Blend refinement: If any visible seams remain, use a very small amount of the mid‑tomato on a fine synthetic brush and gently pull the edges while uncured for a single micro‑blend, then cure. Because these are cream gels, small adjustments yield smooth transitions without streaking.
- Opacity strategy: If colors appear translucent after one pass, repeat the thin layering sequence (coral → tomato → burnt orange) rather than applying a single thick coat; this preserves shape and prevents edge lift.
- Finish: Apply a full‑coverage high‑gloss topcoat and cured according to lamp specs; wipe any inhibition layer using your chosen clean finish method.
When to add variations and photographic styling
For bridal upsells, add a single coral accent nail or a deep cherry tip for contrast while keeping the remaining nails as sunset ombré. For photos, position hands against warm, neutral backgrounds so the cream gloss reads like a mirror without catching cool reflections that shift the reds toward magenta. Keep consistent lighting across appointments for predictable results.
Why we spotlight No‑HEMA Gel 471
No‑HEMA Gel 471 represents the light coral orange endpoint of the Fall Vibes Collection and functions as the visual sunrise at the base of the nail in this technique. On long stiletto panels it provides the lift and brightness needed to transition into the vivid tomato mid‑zone; in practical use we rely on 471 for predictable coverage in a single thin pass on top of a sealed base, which streamlines timing for back‑to‑back bridal bookings.
Safety and handling notes
We recommend curing each layer fully to the lamp’s specified time to avoid tacky layers that collect debris, and to minimize technician exposure always cap bottles when not in use and work in a well‑ventilated area. Because these polishes are HEMA‑free, they reduce a common allergen risk, but we still advise routine glove use for technicians who mix many services in a day and to follow basic salon hygiene for tools and disposables.
FAQ
- Can beginners produce a seamless blend? Yes — by using thin, controlled passes and curing between layers you reduce mistakes; practice the feathered overlap on tips before client work.
- Do these creams show brush strokes? High pigmentation with proper thin layering minimizes strokes; use a clean, medium‑flat brush for smoothing if needed.
- How long do cured layers take? Cure times are typically 60–120 seconds per layer under a standard LED/UV lamp, adjust to your lamp’s output.
We use this workflow in compact home studios where cleanliness, consistent timing and a predictable color trio are essential; the Fall Vibes Collection’s progression from light coral through tomato to burnt orange keeps appointments fast without sacrificing a polished, bridal‑ready finish.
Checklist Recap
- Station set: liner, lamp, lint‑free wipes, clean tools.
- Prep: dehydrate, buff, seal with thin base.
- Paint: coral base (No‑HEMA Gel 471), tomato bridge, burnt orange tip; thin passes.
- Cure: 60–120s per layer; finish with high‑gloss topcoat.
- Safety: ventilate, cap bottles, wear gloves as needed.
For a predictable sunset ombré on long stiletto nails consider ordering the balanced warm trio in the Fall Vibes set No-HEMA Gel Polish Fall.